SOLVED Why are some start points becoming "2"? How might I fix it efficiently?
-
I’ve started to have a strange issue, and I’m not quite sure where it’s coming from, but it is blocking my build, and somewhat tedious to fix manually.
That is, sometimes the start point for a contour will have index
2on the oncurve point, and index0is given to an offcurve two points before: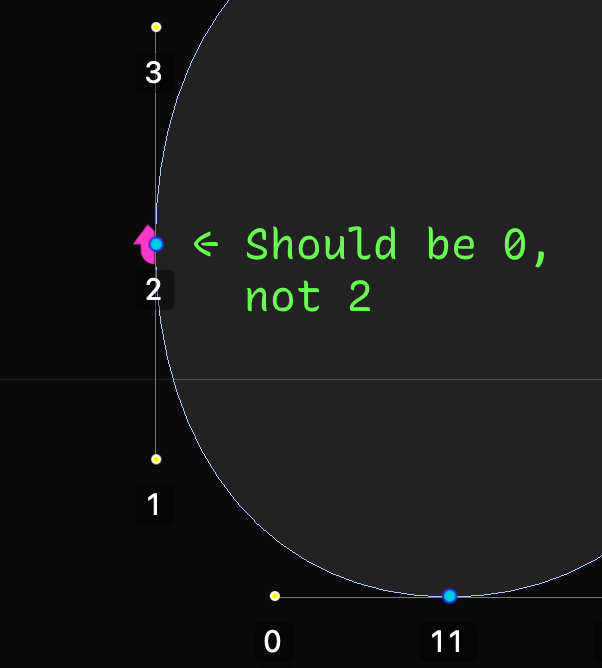
This can be corrected manually by selecting the oncurve, right clicking, and selecting "Set Start Point."
However, it’s slightly tricky to find, and when I have a lot of font sources in play, it becomes tedious to fix these.
I’m not sure exactly when this problem came up – it may be from RF4, or it may be from ufoNormalizer, or it may even be from occasionally opening UFOs in GlyphsApp.
I’ve come up with a way programmatically to find such mismatches, but I haven’t yet found a way to correct them. If I’m in a problem glyph, I can find the issue with this:
g = CurrentGlyph()

for contour in g:
    pointCount = 0
    for segment in contour:
        for point in segment:
            if pointCount == 0 and pointCount+1 != point.index:
                print("Start point problem!")
                print(f"Glyph {g.name}, Contour {contour.index}")
I would think that I could then use...
contour.setStartSegment(contour[segment.index])...to set that segment as the start segment, and thus that point as index
0. But, that doesn’t work. I can set other segments as the start, e.g. withcontour.setStartSegment(contour[segment.index+1]), but if the index is off like this, those different starting segments will also be indexed incorrectly.I would be super appreciative of any info on A) where the issue might be coming from, and/or B) how I might correct it.
Thank you!
-
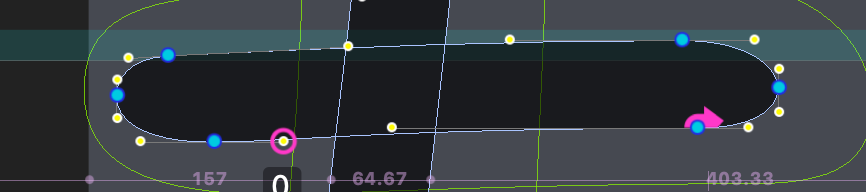
With UFO the starting point (first point in the contour list of points) is not always a on curve point. As a UFO just makes a loop.
The symbol for direction of a contour looks very strange when its attached on a off curve point. So yes after 40 years being one, you'll have two now!
This change in the recently in RF4.2. And is important to visualise the data correctly.
The conversion between quad/cubic should maintain the startpoint if it was an on curve. (an issue to fix is being made)
-
@frederik I think a good question here is why cubic to quadratic conversion moves the start point from an on-curve where it starts in the cubic, to the preceding off curve point where it sometimes ends in the quadratic. We can only hope that symbols for where the contour starts and what direction it’s going, never become two places, after 40 years of being one.
-
the example script shows two different approaches: one is the fontParts
setStartSegmenton the first contour and an other approach on a second contourYou will need to combine and rearrange into a working script.
good luck!
-
For some reason, Frederik’s script wasn’t quite solving this ... It worked on one contour, but messed another one up newly.
In the above example, the start point was an oncurve, and this script moved it one up, to the following offcurve. Running the script again moves it to the next offcurve after an oncurve, so running it many times makes the start point rotate around the contour. It did seem to work as desired on the other contour of this glyph, though.
Luckily, Frank’s script worked perfectly, for a full UFO! So, for now I will just accept that I have a solution, and will try to properly understand that after some immediate tasks. I just wanted to update this post in case that helps others.
-
I’ve made an issue in the FontParts repo to request a simpler way to set start points:
-
Amazing; thank you so much for the solutions and deeper background info, @frederik and @frankrolf! This is really helpful and very much appreciated.
-
Here is a script which you could potentially wrap into an observer: https://github.com/roboDocs/ScaleFast/issues/5#issue-499348737
-
He Stephen
setting the starting point with fontParts results in
off off curvestart structure# assume a glyph with 2 ovals g = CurrentGlyph() # setting the start segment for the first oval # the result will be a off curve as first point g[0].setStartSegment(1) # setting the start point on the oncurve # get the contour object contour = g[1] # create an empty list for all the point data points = [] hasOncurve = False # start looping over all the points in the contour for point in list(contour.points): if point.type != "offcurve": hasOncurve = True # store the point data points.append(( (point.x, point.y), point.type, point.smooth, point.name, point.identifier )) # remove the point from the contour contour.removePoint(point) if hasOncurve: # start a while loop and check the first point type # only start the loop when there are on curve points while points[0][1] == "offcurve": # pop the first point point = points.pop(0) # and add it to the end points.append(point) # add all newly arranged points into the contour for position, type, smooth, name, identifier in points: contour.appendPoint( position, type=type, smooth=smooth, name=name, identifier=identifier )
Smart sets!!
There is a complete api to set and edit and manipulate smart sets!!
see https://robofont.com/documentation/reference/api/mojo/mojo-smartset/- you can set a query direclty in font window, handy for fast searches and temp sets:
from mojo.UI import CurrentFontWindow

w = CurrentFontWindow()
# set a list as a query directly in the font collection
w.setGlyphNamesAsSet(["A", "B", "C"])
-
If anyone (including my future self) comes along looking for a semi-manual solution, here’s a better one that what I listed above.
- Open all the fonts you wish to check.
- Run the following Python in the Scripting Window:
for f in AllFonts():
    print(f.info.styleName)
    glyphsToCheck = []
    for g in f:
        for contour in g:
            pointCount = 0
            for segment in contour:
                for point in segment:
                    if pointCount == 0 and pointCount+1 != point.index:
                        if g.name not in glyphsToCheck:
                            glyphsToCheck.append(g.name)

                    pointCount += 1

    print(" ".join(glyphsToCheck),"\n")
This will print out a list to the console, like this:
Text Ultra Italic
eight registered

Text 200 Italic
thorn b a.italic question six d nine oe a p o copyright ringcomb g q

Text Hairline Italic
nine.dnom a.italic OE.RECT O.sups degree O d five.dnom five.onum S five three.dnom s zero.dnom question o.sups partialdiff S.sups copyright thorn infinity dollar.open eth six eight zero q b eight.dnom Ohorn.RECT g C OE p six.hiviz s.sups ampersand Omega five.tnum section six.dnom_hiviz dollar registered O.RECT zero.onum o six.dnom
Then, you can "create a new set from glyphs names"
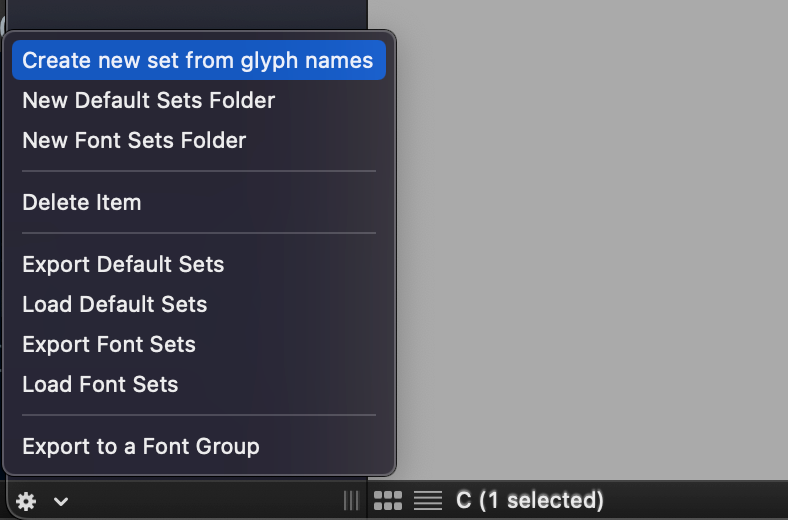
Copy and paste in the glyph names, then label it with a name like "temp" or "corrections":
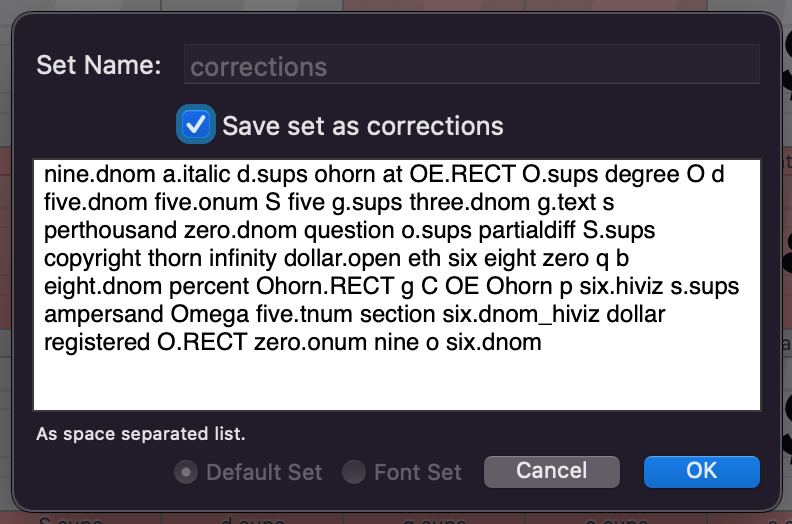
This then makes it relatively fast to go through all the affect glyphs, using a shortcut to set the start point, then the shortcut to move to the next glyph in the font view
command+shift+).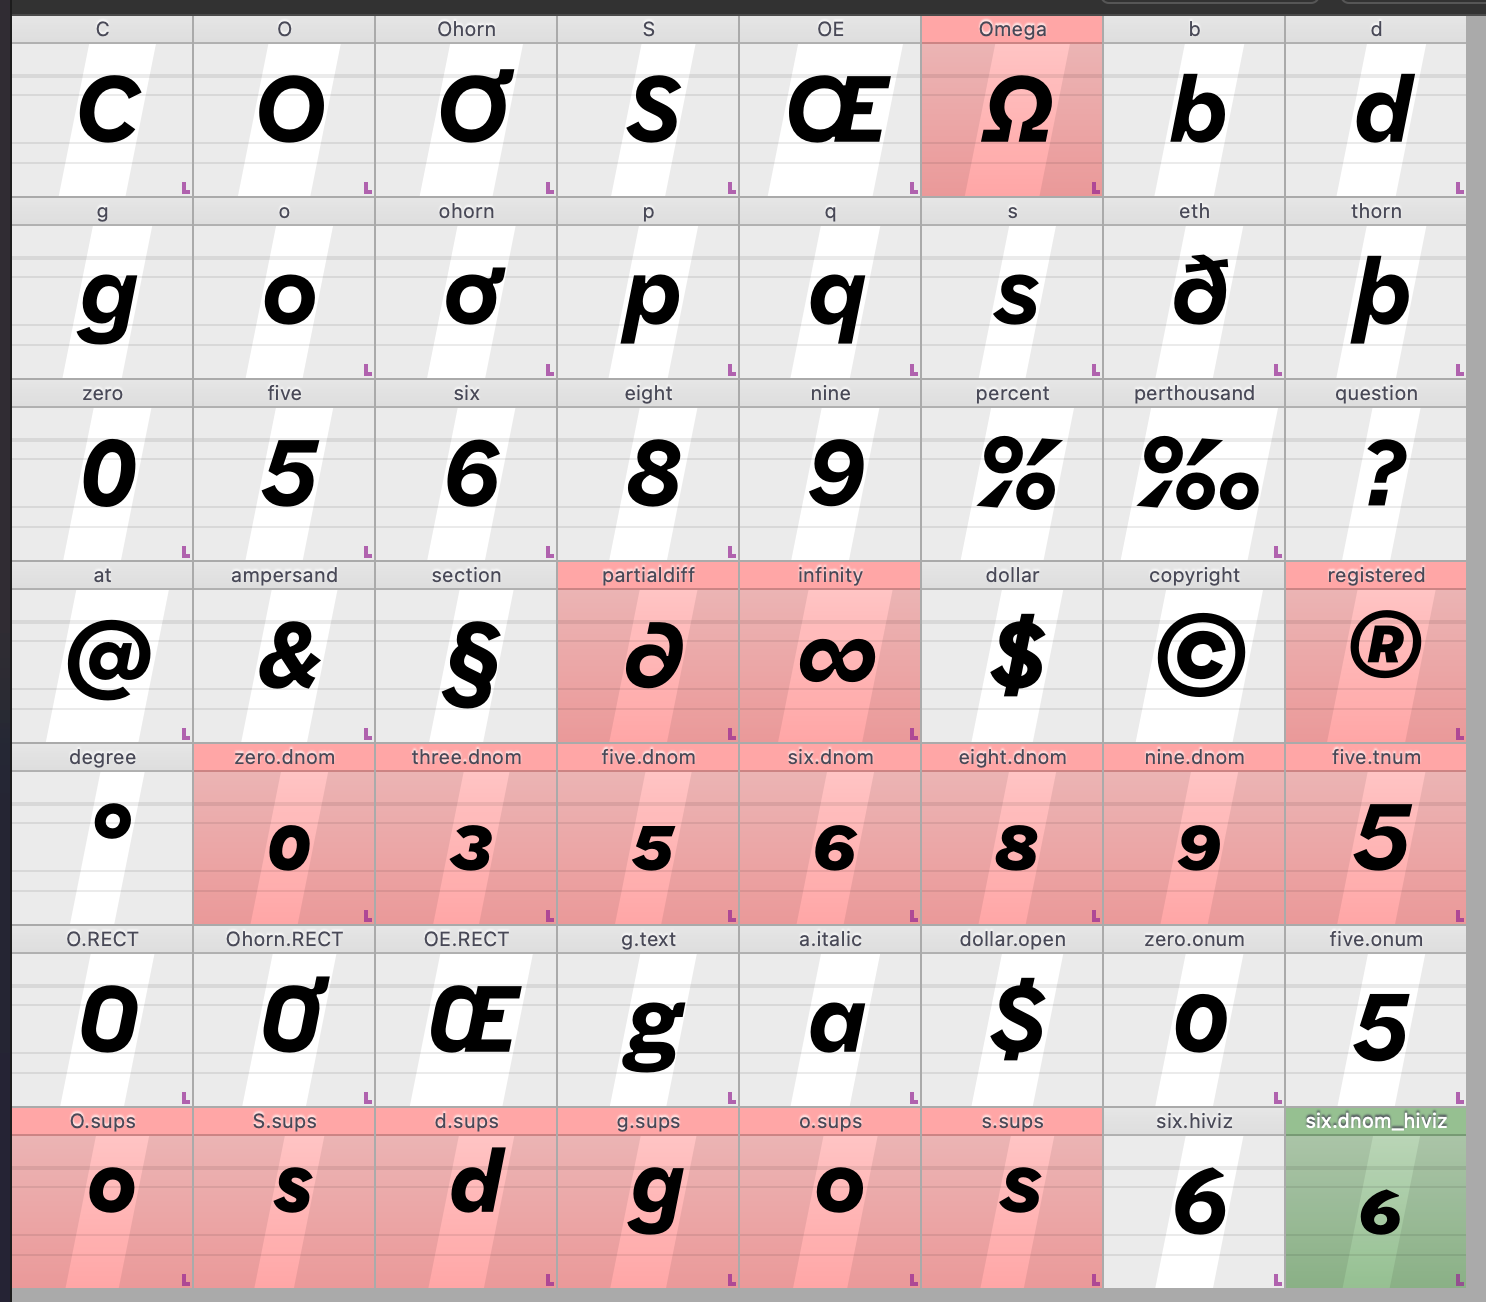
Once you finish, you can then delete the set.
I’m guessing there is a faster way to fix this, and it would probably be worth finding if you had many sources to fix... but for a small number of fonts, this is pretty quick.
-
I am still interested if there is a programmatic way to set a specific oncurve start point, as asked above.
However, I may be facing this problem because FontMake added a new compatibility checker in v3.1.0, and this checker may be overly strict.
-
Excellent; thanks for the helpful explanation, Frederik! That’s a really nice documentation page.
Do you know if there’s a fairly direct way to set the oncurve as the start point, in a Python script?
-
the short answer: this is clarified in the upcoming release
https://robofont.com/documentation/reference/workspace/glyph-editor/contours/#point-representations
(this link will be gone in a few days, since the release is close)
long story:
The start point and the symbol to indicate the direction are not the same. In a UFO a contour can start with an off curve or an on curve and still represent the same visual contour:
# 3 times the same contour
off off curve line line
off curve line line off
curve line line off off
The first on curve is not always the starting point. This was never a problem since fontMath does calculations nicely between different point structures. Other tools aren't so nice and choke.
RoboFont 4.2 has two symbols: one for the starting point and one for the direction (the direction is always highlighted on a on curve point)
hope this make sense!
-
In the above GLIF code, both contour is messed up, but each contour should begin with one of the
type="curve" smooth="yes"points.<point x="93" y="536" type="curve" smooth="yes"/> <point x="93" y="189"/> <point x="308.7858439201" y="-28"/>
-
The above is a simplified UFO with one glyph.
If you prefer just the .glif XML:
<?xml version="1.0" encoding="UTF-8"?>
<glyph name="o" format="2">
	<unicode hex="006F"/>
	<advance width="1262"/>
	<outline>
		<contour>
			<point x="308.7858439201" y="1102"/>
			<point x="93" y="883"/>
			<point x="93" y="536" type="curve" smooth="yes"/>
			<point x="93" y="189"/>
			<point x="308.7858439201" y="-28"/>
			<point x="631" y="-28" type="curve" smooth="yes"/>
			<point x="953.2141560799" y="-28"/>
			<point x="1169" y="189"/>
			<point x="1169" y="536" type="curve" smooth="yes"/>
			<point x="1169" y="883"/>
			<point x="953.2141560799" y="1102"/>
			<point x="631" y="1102" type="curve" smooth="yes"/>
		</contour>
		<contour>
			<point x="789" y="841"/>
			<point x="868" y="731"/>
			<point x="868" y="536" type="curve" smooth="yes"/>
			<point x="868" y="341"/>
			<point x="786" y="233"/>
			<point x="631" y="233" type="curve" smooth="yes"/>
			<point x="476" y="233"/>
			<point x="395" y="341"/>
			<point x="395" y="536" type="curve" smooth="yes"/>
			<point x="395" y="731"/>
			<point x="473" y="841"/>
			<point x="631" y="841" type="curve" smooth="yes"/>
		</contour>
	</outline>
	<anchor name="top" x="630" y="1072"/>
	<anchor name="ogonek" x="810" y="0"/>
	<anchor name="bottom" x="631" y="-28"/>
	<guideline x="631" y="102" angle="90" color="0.999,0.001,0.001,0.39962" identifier="wGX5S9dabk"/>
</glyph>
-
-
I have a theory. Can you post a GLIF for me to test with?
-
Hmm, it is possible this was a side-effect of a script I wrote to correct contour direction, so all exterior contours would have the same winding direction. Maybe the
c.reverse()function will occasionally mess with the start point index?for f in AllFonts(): for g in f: try: for c in g.contours: if c.clockwise == True: c.reverse() except: print(f"{g.name} couldn’t be wound counter-clockwise") pass
-
I’ve at least been able to adapt my script slightly to point out problem glyphs, though I would still love to find an automatic fix.
g = CurrentGlyph()

for f in AllFonts():
    print("\n", f.info.styleName)
    for g in f:
        for contour in g:
            pointCount = 0
            for segment in contour:
                for point in segment:
                    if pointCount == 0 and pointCount+1 != point.index:
                        print(f"\t ⚠️ Glyph {g.name}, Contour {contour.index}")
                        contour.setStartSegment(contour[segment.index])

                    pointCount += 1
This is currently yielding this result, showing that the problem is somewhat prevalent, though not horribly common:
 Display Bold
	 ⚠️ Glyph g.sups, Contour 1
	 ⚠️ Glyph o.sups, Contour 0
	 ⚠️ Glyph o.sups, Contour 1
	 ⚠️ Glyph partialdiff, Contour 0
	 ⚠️ Glyph two, Contour 0
	 ⚠️ Glyph o, Contour 0
	 ⚠️ Glyph o, Contour 1

 Text Ultra
	 ⚠️ Glyph questiondown, Contour 0
	 ⚠️ Glyph question, Contour 0
	 ⚠️ Glyph three, Contour 0
	 ⚠️ Glyph o.sups, Contour 0
	 ⚠️ Glyph o.sups, Contour 1
	 ⚠️ Glyph thorn, Contour 1
	 ⚠️ Glyph six, Contour 0
	 ⚠️ Glyph two, Contour 0
	 ⚠️ Glyph section, Contour 1
	 ⚠️ Glyph nine, Contour 0
	 ⚠️ Glyph o, Contour 0
	 ⚠️ Glyph o, Contour 1

 Text Hairline
	 ⚠️ Glyph questiondown, Contour 0
	 ⚠️ Glyph g.sups, Contour 1
	 ⚠️ Glyph question, Contour 0
	 ⚠️ Glyph three, Contour 0
	 ⚠️ Glyph o.sups, Contour 0
	 ⚠️ Glyph o.sups, Contour 1
	 ⚠️ Glyph thorn, Contour 1
	 ⚠️ Glyph parenleft, Contour 0
	 ⚠️ Glyph two, Contour 0
	 ⚠️ Glyph section, Contour 1
	 ⚠️ Glyph nine, Contour 0
	 ⚠️ Glyph o, Contour 0
	 ⚠️ Glyph o, Contour 1

 Text Bold
	 ⚠️ Glyph ohorn, Contour 0
	 ⚠️ Glyph ohorn, Contour 1
	 ⚠️ Glyph questiondown, Contour 0
	 ⚠️ Glyph question, Contour 0
	 ⚠️ Glyph three, Contour 0
	 ⚠️ Glyph o.sups, Contour 0
	 ⚠️ Glyph o.sups, Contour 1
	 ⚠️ Glyph partialdiff, Contour 0
	 ⚠️ Glyph thorn, Contour 1
	 ⚠️ Glyph six, Contour 0
	 ⚠️ Glyph two, Contour 0
	 ⚠️ Glyph section, Contour 1
	 ⚠️ Glyph nine, Contour 0
	 ⚠️ Glyph o, Contour 0
	 ⚠️ Glyph o, Contour 1

 Display Ultra
	 ⚠️ Glyph ohorn, Contour 0
	 ⚠️ Glyph questiondown, Contour 0
	 ⚠️ Glyph question, Contour 0
	 ⚠️ Glyph o.sups, Contour 0
	 ⚠️ Glyph o.sups, Contour 1
	 ⚠️ Glyph partialdiff, Contour 0
	 ⚠️ Glyph six, Contour 0
	 ⚠️ Glyph two, Contour 0
	 ⚠️ Glyph nine, Contour 0
	 ⚠️ Glyph o, Contour 0
	 ⚠️ Glyph o, Contour 1

 Display Hairline
	 ⚠️ Glyph questiondown, Contour 0
	 ⚠️ Glyph oe, Contour 0
	 ⚠️ Glyph question, Contour 0
	 ⚠️ Glyph o.sups, Contour 0
	 ⚠️ Glyph o.sups, Contour 1
	 ⚠️ Glyph partialdiff, Contour 0
	 ⚠️ Glyph thorn, Contour 1
	 ⚠️ Glyph six, Contour 0
	 ⚠️ Glyph nine, Contour 0
	 ⚠️ Glyph o, Contour 0
	 ⚠️ Glyph o, Contour 1